
Hey there,
It’s been a long time since I wrote an article but I plan to get back to doing this often because I have learned a lot in the past few months that I would love to share with developers that are interested.
One of the things that I have learned are about doing Infrastructure automation with actual programming languages that I use everyday. I have come to appreciate this a lot because this means that provisioning infrastructure for me means I have to worry about one less thing (learning a new programming language) that might not have been the case before now.
Quick background before we go into the details of provisioning your infrastructure, I would want to describe Infrastructure as code and the tool that I use.
What does Infrastructure as Code even mean?
Infrastructure as code (IaC) is the process of managing our applications infrastructure with code or scripts rather than physically configuring infrastructure. We can treat our IaC declarations the way we treat our source code meaning we can version, test before deploying and rollback our infrastructure.
What IaC tool would we use in this article?
Pulumi. Pulumi is an open source IaC tool that allows you provision your infrastructure in real programming languages. The languages Pulumi supports are JavaScript, TypeScript, Python, Go, or any .NET language, including C#, F#, and VB. Pulumi supports cloud providers like Azure, AWS & GCP. They also have an out of the box support for Kubernetes environments.
In this article, I would be going through steps for setting up pulumi and creating your own infrastructure and we would be using Azure as our cloud provider. By the end of this article, you should be able to setup and authenticate pulumi with Azure, you should also have created Azure resources for a Function app.
What you’d need to follow through:
- An Azure Account
- A Text Editor (e.g. VS Code)
- Node installed
- Typescript
Setting up:
Install Pulumi:
Download and install Pulumi. Depending on your environment, you should use any of the commands:
Windows
choco install pulumi
MacOS
brew install pulumi
Linux
curl -fsSL https:get.pulumi.com | sh
Configure Azure for Pulumi:
Pulumi authenticates with Azure in two ways.
- Azure CLI login
- Service principal authentication
For the sake of this tutorial, we would use the Azure CLI login. However, if you’re ever running pulumi in production and need to manage your infrastructure resources in your build or release pipeline, you would use the service principal authentication.
To use the Azure CLI login, open your terminal and run this command:
az login
After successfully logging in, you will need to create a storage account and blob container in your Azure subscription. You need this because this is where pulumi stores the state of your infrastructure and we’d do this in the next few steps.
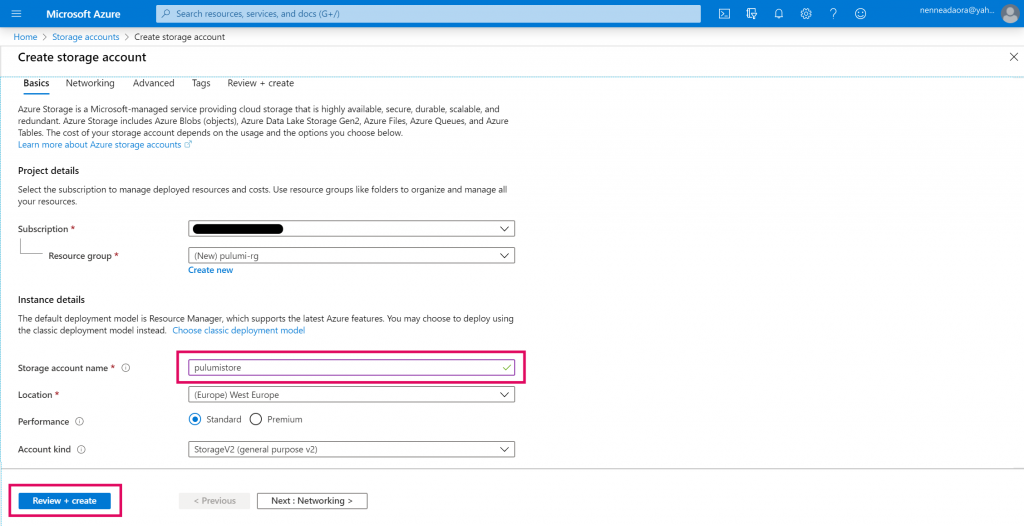
Step 1: Go to the Azure portal and create a storage account. Give it whatever name you like. For this tutorial, I called my storage account pulumistore.
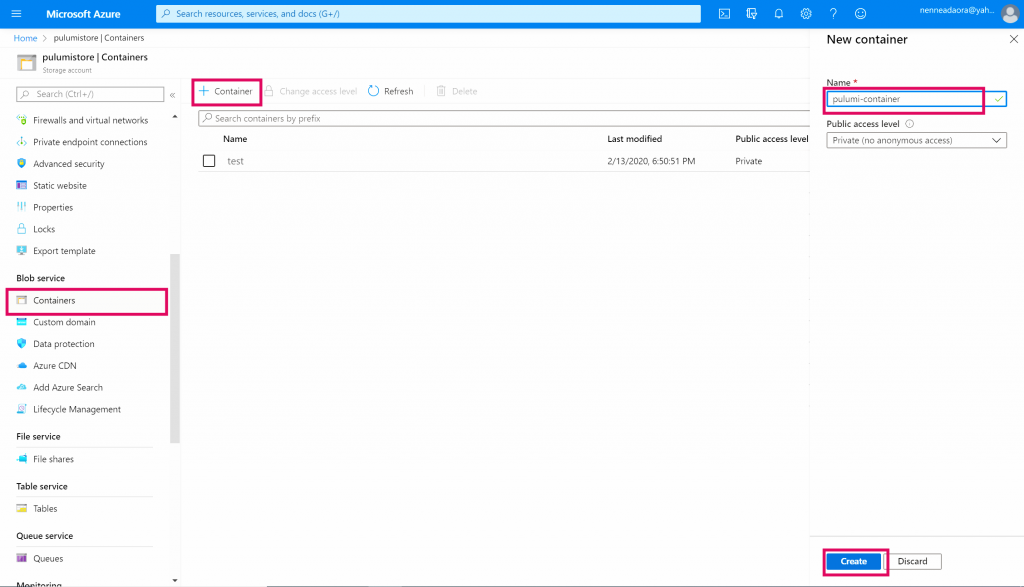
Step 2: Once you’ve successfully created your storage account, click on the Containers tab and create a container with private access. I called mine pulumi-container.
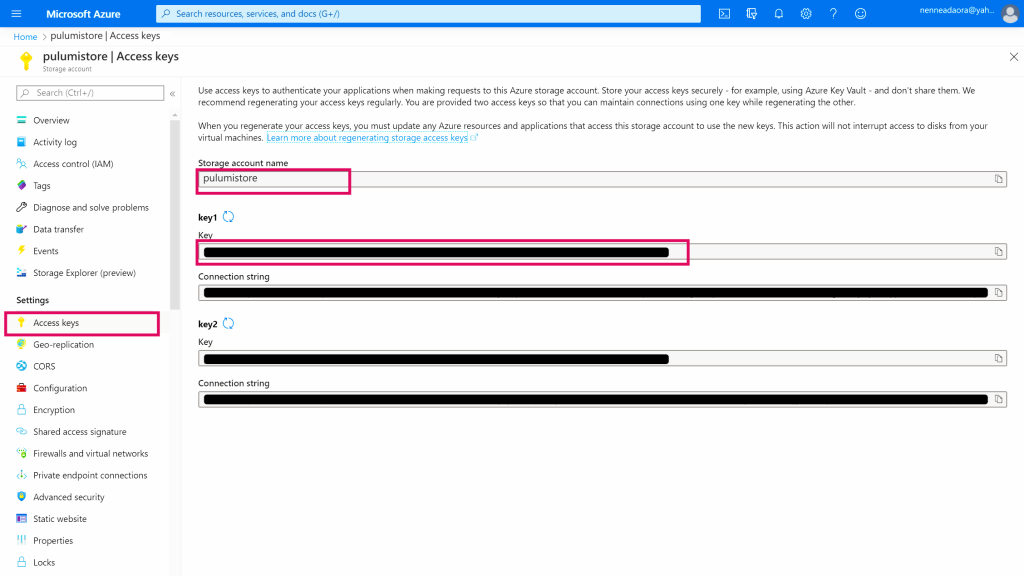
Step 3: Once you’ve successfully created your blob container, go back to the access keys tab on your storage account because you would be needing three things to move on; storage account name, storage account key and blob container name.
Step 4: Once you have the three values needed to proceed, open your terminal window and set these environment variables. I am using the terminal in VS code so this is what my commands would look like.
$env: AZURE_STORAGE_ACCOUNT = "storage-account-name"
$env: AZURE_STORAGE_KEY = "storage-account-primary-key"
Now you’re all set to login to pulumi. To do that run this command:
pulumi login --cloud-url azblob://<blob-container-name>
We have successfully authenticated pulumi with Azure using our blob container as our pulumi backend.
Creating a new project:
Next, we would create a tutorials folder and create our pulumi project inside it. Run these commands in your terminal:
mkdir tutorials && cd tutorials && pulumi new azure-typescript
As pulumi creates a project for you, the CLI will walk you through a few steps. You can choose to set your project name, description, stack name and azure location or you can use the defaults that pulumi provides by hitting the Enter key. It’s totally up to you.
Once you have this set up, you should have an index.ts, Pulumi.yaml & Pulumi.dev.yaml (If you didn’t change the stack name).
Let’s go through what each of these files actually do:
- index.ts – This is the entry point for our code. If we declare any Azure resources in this file, pulumi would create it for us.
- Pulumi.yaml – This defines the pulumi project.
- Pulumu.dev.yaml – This file contains configuration values for the dev stack. You could think about stacks the way you would think about your environments. You could create a staging stack and have those config values map to your staging environment, you could also do that for you local environment and your production environment as well.
Creating resources for our Azure function app:
To create our Azure function app, we would need to create a few resources:
- Resource group
- App service plan
- Storage account
- Function app
The code snippet below allows us use Pulumi and Typescript to declare these Azure resources.
To create the resources you just declared, run the command below in your terminal (make sure you are still logged in to pulumi and you are in your pulumi project directory):
pulumi up
It would do a preview of all the resources to be created and ask if you would like to continue. You can select yes.
Congratulations!!! You have finally created Azure resources using pulumi. You can go to your Azure portal to confirm that they are there.

Don’t forget to delete those Azure resources when you are done playing around with your new shiny toy 😊😊. You can do this by running:
pulumi destroy
If you like this tutorial and you’d want me to do more of these, please let me know.
Also, a few weeks ago, I created a YouTube video introducing IaC. Here’s a link in case you want to check it out 🙂
1 thought on “How to define your Infrastructure with Typescript & Pulumi”