

After some time, I FINALLY got my pwa to where I wanted it to be. There is obviously room for improvement, but I would like to share how I was able to achieve these scores.

Performance
-
Serve images in next-gen formats:
Lighthouse suggested that I use image formats like JPEG2000 or WebP. I would advice that you don’t jump straight into changing all your images to a next-gen format , because they aren’t fully compatible with all browsers. I was able to use a slightly different approach. I used a javascript function to check if the browser supported webp (what I used). If it did, I’d show the next-gen image and if it didn’t I’d show the fallback jpeg.
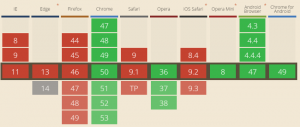
WebP browser compatibility from caniuse.com Since I was using VueJS, It was sorta easy. I used this script to check if my browser could render WebP
checkWebpSupport: function(callback){

    if(!window.createImageBitmap){ //webp is not supported if this method doesn't exist in the browser
        callback(false);
        return;
    }

    var webpdata='data:image/webp;base64,UklGRiQAAABXRUJQVlA4IBgAAAAwAQCdASoCAAEAAQAcJaQAA3AA/v3AgAA=';

    // Retrieve the Image in Blob Format
    fetch(webpdata).then(function(response){
        returnresponse.blob();
    }).then(function(blob){
        // If the createImageBitmap method succeeds, return true, otherwise false
        createImageBitmap(blob).then(function(){
            callback(true);
        },
        function(){
          callback(false);
        });
    });
}
this.checkWebpSupport(function(isSupported){ if(isSupported){ this.webpIsSupported = true; //console.log("Webp is Supported"); }else{ this.webpIsSupported = false; //console.log("Webp is not supported"); } });In my VueJS, I used this function like this:
<img src="pathto/image.webp" v-show="webpIsSupported" alt="..."/>
<img src="pathto/image.jpg" v-show="!webpIsSupported" alt="..."/> <!--This is the fallback-->
-
Properly size images:
I was able to do this (for the static images I wasn’t getting from an external source), by creating the same image with multiple dimensions and using media queries to show them according to the size of the window with the <picture> tag. Here’s the funny thing I realized. So if we have an image that is 53kb and has dimensions 700px by 700px, it is not the appropriate size for a mobile phone that is 480px wide. But one would think “its 53kb, its small enough” but turns out, its not.
Even if we use css to make the image fit, the truth is that its unnecessarily large for a mobile device. An image with dimensions 470px by 470px is good enough as it saves data and improves load time since its a smaller image (for a “smaller” device). Here’s how I did it in code:
<picture> <source media="(max-width: 480px)" srcset="pathto/small-width-image.webp" alt="..."> <source media="(max-width: 767px)" srcset="pathto/medium-width-image.webp" alt="..."> <source media="(min-width: 768px)" srcset="pathto/large-width-image.webp" alt="..."> <img src="pathto/default-image.webp" alt="..."> <!--Fallback image--> </picture> -
Defer Unused CSS:
I was able to achieve this in code by doing:
<link rel="preload" as="style" onload="this.rel='stylesheet'" href="/pathtocss" />
“Link preload helps us to write declarative fetch requests in HTML head tag, specifying resources that your pages will need very soon after loading, which you therefore want to start preloading early in the lifecycle of a page load, before the browser’s main rendering machinery kicks in. This ensures that they are made available earlier and are less likely to block the page’s first render, leading to performance improvements.” – Mozilla Developer Network
-
Enable compression and leverage browser caching:
I was able to achieve this with my .htaccess file.
Progressive Web App (PWA)
This is the main objective. Our website should be a PWA. However, in order to do this, we needed to improve our website performance and now we have. Congratulations to making it this far.
In the previous post, when installing our VueJS app, we added PWA support so our application is automatically created with a service worker and a manifest file. If you are using
npm run serve
There is a chance that you might be having mixed feelings about this. Not to worry. You haven’t built your project yet. Build and serve your projects using the following commands:
npm run build
npm run serve -s dist
Once you do this, you will be viewing the compiled version of your app in the dist/ folder. If you try auditing your PWA with lighthouse again, you would see that you will no longer get the manifest and service worker error. This is because these things have been created for us. You may want to add some more metadata to your manifest file. Feel free to do so but I would advice you go through this. To fix the https error, host on a server and purchase an SSL certificate. That would do it.
Once you have this, we have finally created our PWA together. However this could be built on and I would recommend following this udacity course or reading on google to help you know more about building progressive web apps.
Very nice job… Thanks for sharing this amazing and educative blog post!
Excellent pieces. Keep posting such kind of info on your blog. I’m really impressed by your site.
AWS Training in Hyderabad
AWS Course in Hyderabad
I read your blog and i found it very interesting and useful blog for me. I hope you will post more like this, i am very thankful to you for this type of post.
Artificial Intelligence Training in Hyderabad
Artificial Intelligence Course in Hyderabad